Canadian Orienteering Federation
RouteGadget: Viewing routes & Drawing your route
RouteGadget allows orienteers to use the web to draw their routes from recent events and compare them to other orienteers on their course. It also allows the race to be replayed, either with staggered starts or with a simulated mass start. You will actually see little squares run across the map. It adds another dimension to post-race analysis.
RouteGadget is quite intuitive and easy to use. Here's a short summary to give you a quick start. To begin, surf to rg.orienteering.ca. You will see something like this...
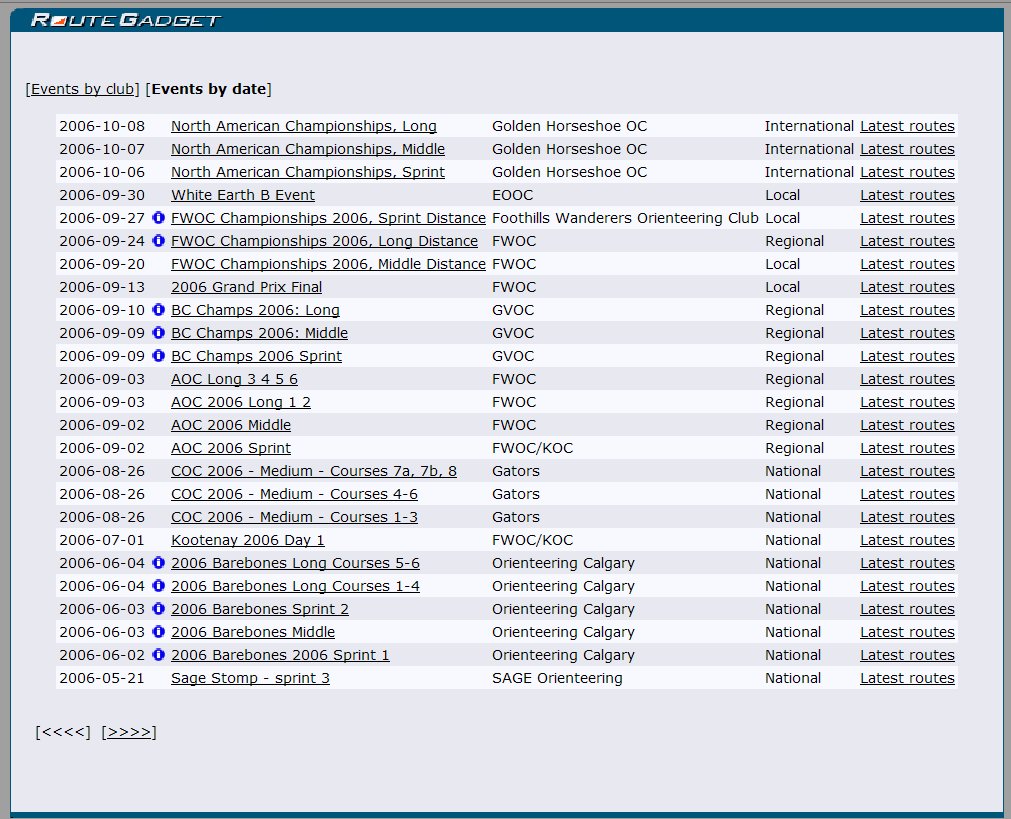
On this screen you will see all events in the Canadian database. You can sort these either by Date or by Club by clicking in the top left corner...
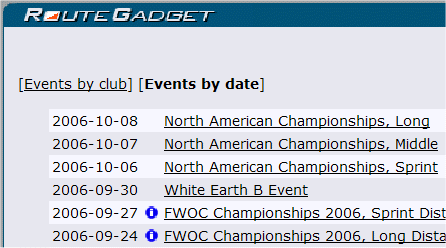
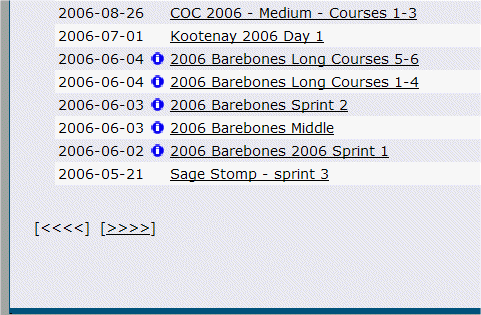
You can scroll the events by clicking on the "<<<<" or ">>>>" in the bottom left corner...
It an event has a blue "i" beside it you can click on this to get some information about the event.. This might include weather conditions or perhaps event officials, depending on what the organizer provided.
By clicking on "Latest Routes" you can quickly see the most recent routes that have been drawn.
How to view existing routes
- First you need to select an event. You will then see a screen similar to this...
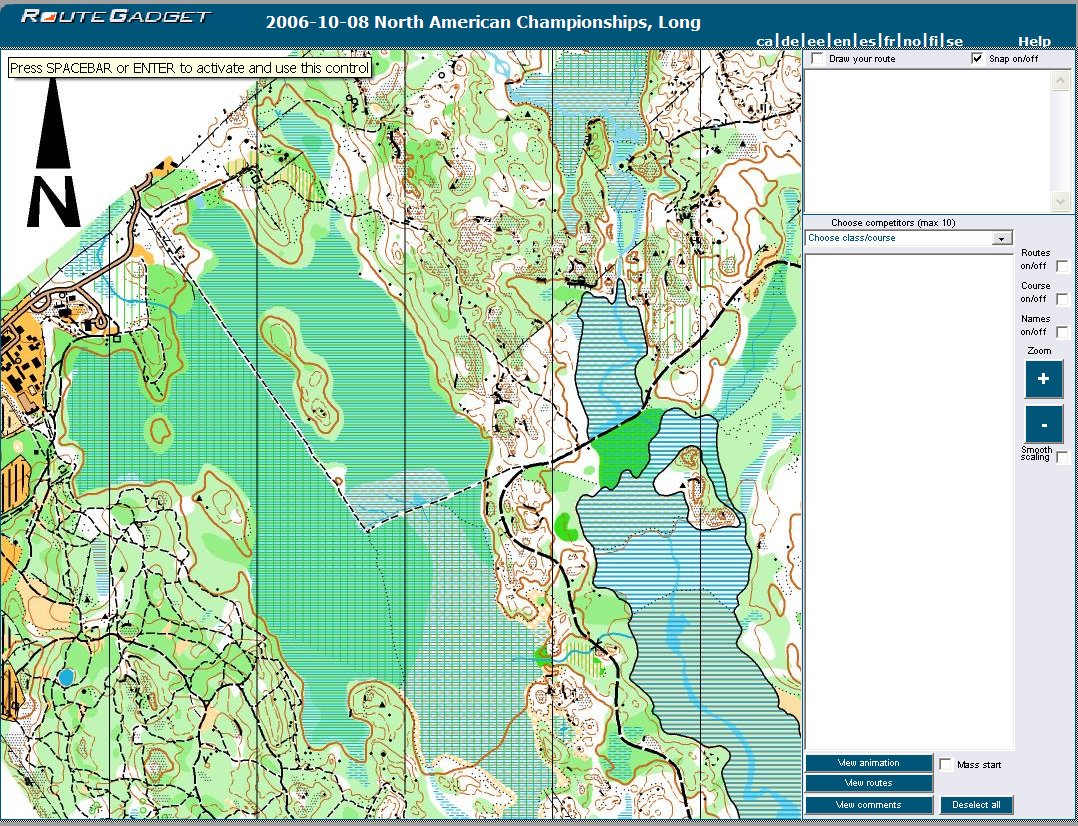
- Once you've selected an event, you can move the map around by pressing and holding down the left mouse button somewhere on the map while moving the mouse in the desired direction. You can zoom in/out using the big blue "+" and "-" buttons on the right side of the screen.
- Select a course from the "Choose class/course" box on the right side of the screen. The top right corner of the screen should now look like this:
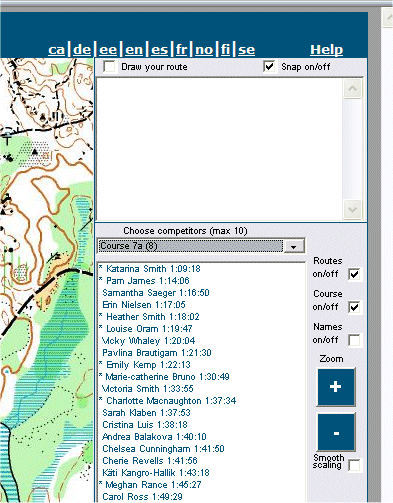
- To view competitors' routes click on their name. Competitors with an asterisk besides their name have entered their route. Up to 10 competitors can be selected at once. Press the "View Routes" button to see their routes and their splits (which appear in the upper right window).
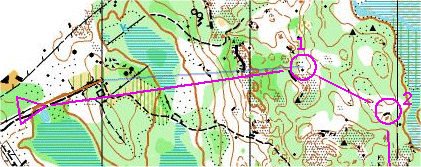
- To start the animation, press the 'View animation' button, and then press the 'Start' button. Small squares representing the selected competitors should start from the triangle.
- During the animation you can move and zoom the map. You can also increase/decrease the animation speed with the 'Speed+/Speed-' buttons.
How to draw your route
Drawing your own routes is equally easy.
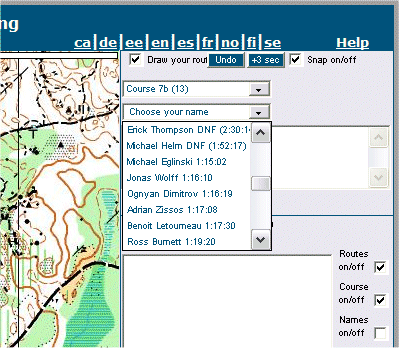
- Begin by clicking the "Draw your route" box in the top right corner of the screen. Then a list of courses will appear. Select your course and then a list of names will appear. It is critical that you choose your correct name - otherwise you will draw someone else's route and it is not easy for us to fix this. Also, once you have finished entering your route, you will not be able to re-enter it. So please be a little bit careful at this point.
-
Once you have (carefully) selected your name, a small red dot will appear in the start triangle and a faint grey line will extend from there to the center of the first control circle. Simply click at various points along your route - the red line will follow you and the faint grey line will continue to point to the center of the next control.
-
If you make a mistake, press the blue "Undo" button at the top right of the screen.
-
If you want to include a hesitation on your leg, press the blue "+3 sec" button at the top of the screen. Alternatively you can draw lots of short sideways (back and forth) segments at the point of your heistation.
-
When you click on the center of the control circle you will notice that the faint grey line will change and lead to the center of the next control. If this does not happen you have not "hit" the center of the control yet - be sure to keep an eye on the faint grey line!
Here's some additional suggestions:
- RouteGadget spreads your time out evenly along the route that you draw for each leg. This may not be accurate, particularly if you had trouble with a particular portion of the leg. If you wandered around in some location make sure to include a lot of fine detail in your drawing, even if you don't know exactly where you were. This will appear to slow the animation in that area (and not on the part of the leg where you did well). You can also artificially introduce a pause, if, for example, you stood for a minute relocating. You can show this by creating a small tick mark across your route and oscillated back and forth in place on the tick mark for awhile when you are drawing the route. Then the animation will also appear to pause at the same location.
- In some cases the routes will speak for themselves, but there is also a comment field for you to use. You can write to the comment field when you think of things while you are drawing your route. This can be particularly helpful for beginners looking at the animations and wondering what was going on. Was the route planned or accidental? If it was planned, what was the thinking? Make sure to include the leg number in the comment since the comment is associated with the entire course.
- The RouteGadget administrator can remove your route if you realize that you made a drawing mistake after having saved it. Just send an email to the contacts below.
The COF RouteGadget database was created by Dave Graupner (MOA) & Adrian Zissos (FWOC), and is maintained by Erik Blake (it 'at' orienteering.ca)
RouteGadget software is created and maintained by Jarkko Ryyppo (Finland). Many thanks to Jarkko who provides this software free of charge.
Original User Guide (and photos) provided by Tapio Karras of BAOC.