Canadian Orienteering Federation
RouteGadget
How to load an event into the RouteGadget database
This document is designed to help event organizers load events into the COF's RouteGadget database - for the enjoyment of orienteers around the web! You will need to obtain the user name and password from Erik (see contact information below). Loading an event is a bit tricky the first time, but once you get the hang of it, it is a snap.
NOTES:
- You will need a machine that is able to run Java in order to load events into RouteGadget. This can be a little tricky.
- RouteGadget does not support IOF XML 3.0. Therefore, you need to generate the correct version (IOF XML 2.0.3) of the data files.
Step 1: Create the required data files
Estimated time 5-10 minutes. First create the following files:
- The map
A jpeg or gif image of the map. This can be exported from OCAD ("File" / "Export").
Specs for the image are:- Resolution should be 100-200 dpi.
- Dimensions should not be larger than 1700x1700 pixels.
- File size should not be much larger
than 500 KB for fast download, Thus, the image should only be of
the immediate competition area.
- Course Information
RouteGadget needs information about the location of the control sites and about which controls were on which courses. If the courses were planned using CONDES or OCAD 9 or later then it is very easy to create this information. If you used OCAD 8 it is much more difficult, but still possible (in fact, in this situation you might consider transferring course files to OCAD 9 to make life simpler).
- CONDES
Export course data in XML format: ("File" / "Export Data" / "XML") - choose IOF XML 2.0.3 format - OCAD 9 or later
Export course data in XML format ("Course" / "Export" / "Courses (XML)") - choose IOF XML 2.0.3 format
- OCAD 8:
Make two files: "anyname.dxf" and "courses.txt"-
Move all control numbers to the default position:
- from the menu choose "Course" / "Options". The course options dialog will appear. Press the "Reset All" button", then press "OK" (note: you may have spent a lot of time moving the control numbers so they don't obscure the map - if so, you will need to be careful to exit OCAD without saving - otherwise you will find them all back at their default locations). -
Export the control information: "File" / "Export" / "DXF...". Accept the default settings, and specify the filename to save as (eg: "anyname.dxf")
-
Export the course information: "File" / "Export courses". Choose 'courses' and accept the default filename ("courses.txt").
-
- CONDES
- Results / splits ("by course")
RouteGadget needs the race results (in CSV or in IOF XML 2.0.3 format).
- We highly recommend loading
results BY COURSE (rather than "By Class").
For one thing, "By Course" seems to give less problems, for another it is more fun and allows people to compare with more others. (Note: Unfortunately MeOS does not export by Course, so if you are using MeOS you will be forced to use the less-cool "By Class"). - Ideally you will export the
SportIdent splits in csv format
(semicolon separated). This is the same format as for WinSplits (click
here for instructions about how to create this file - I suggest
you upload the results to WinSplits at the same time because it takes
very little extra time).
You should create two CSV files: one by course (for RouteGadget) and one by class (for WinSplits). Be sure to turn on the "Excel time format" setting (update: Sept 2010 - I believe WinSplits will now also take results "by course", in which case we recommend using the same "by course" CSV file for both RouteGadget & WinSplits - AYZ) - A lot of people use IOFV3 XML rather than the IOFV2.03 XML format. Some organizers have had problems using the IOFV3 format with Route Gadget. To help get around this Michael Raz has written a small application to convert the course and results XML files from IOFV3 to IOFV2.03 format. The application is available here. Simply drag and drop one or both of the V3 files and run. Output is the V2 version of the file(s) dropped.
- We highly recommend loading
results BY COURSE (rather than "By Class").
Step 2: Up-load the files into the RouteGadget database
Estimated time: 10-20 minutes
Once you have created the data files go to rg.orienteering.ca/manager and log on. You will need to obtain the user name and password from Erik (see contact information below). Once you are logged on you will see a screen like this:
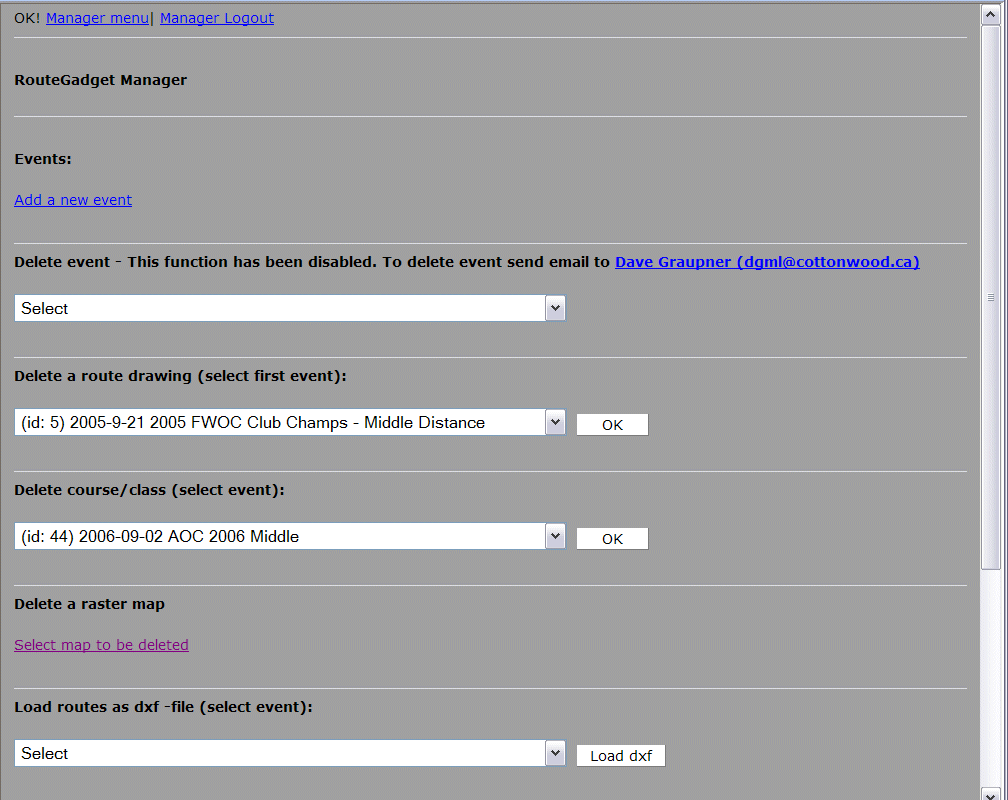
Press "Add a new event". The following will appear:

Make the same selections as shown ("Load new map", "SportIdent CSV", and "IOF-XML (Condes, Ocad9), Individual race" - unless you used Ocad 8. Then press "OK". The following will appear...
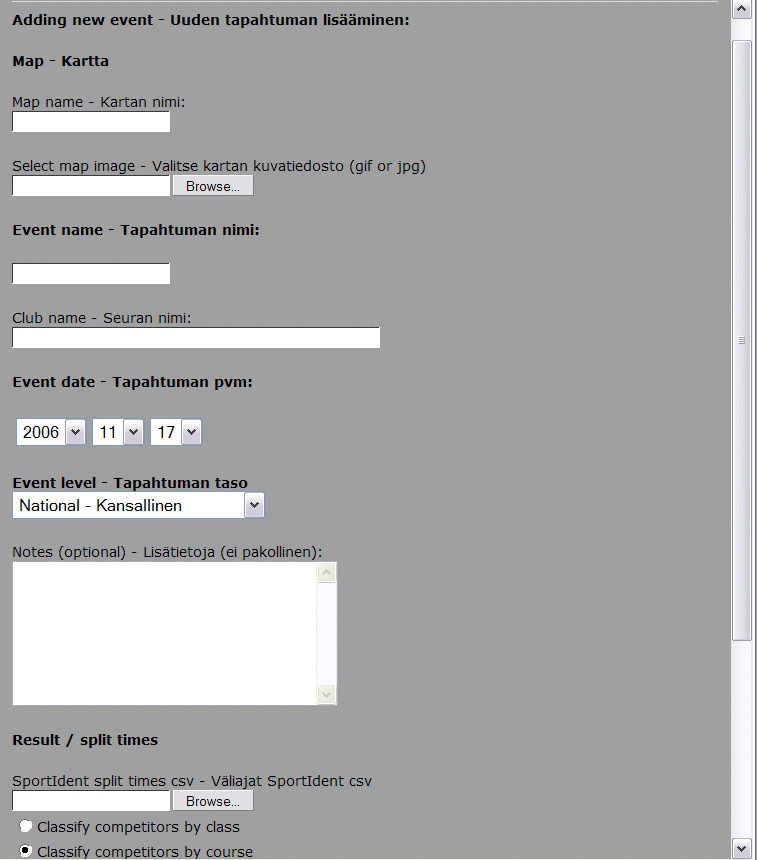
Fill in information about the event:
Map name - enter the obvious name of the map segment (eg: Mt Laurie NW part)
Event name - some characters will not work (for example, the apostrophe) and will "hang" the entire RouteGadget database. We don't have an exhaustive list of what works and what doesn't, so please just use normal letters and spaces.
Club name - this is the club name by which events will be sorted. Please be consistent and use exactly the same name for your club as has been used in the past (otherwise you will end up like the Calgary club which is found in RouteGadget under all of "Orienteering Calgary", "FWOC", and "Foothills Wanderers Orienteering Club" - and that is not ideal). To check, open a browser window and surf to rg.orienteering.ca.
Event date - pretty obvious
Event level - also pretty obvious
Notes - in this you can put information about who was the course planner, weather conditions for the race, etc.
Now scroll down to see the bottom of the page...
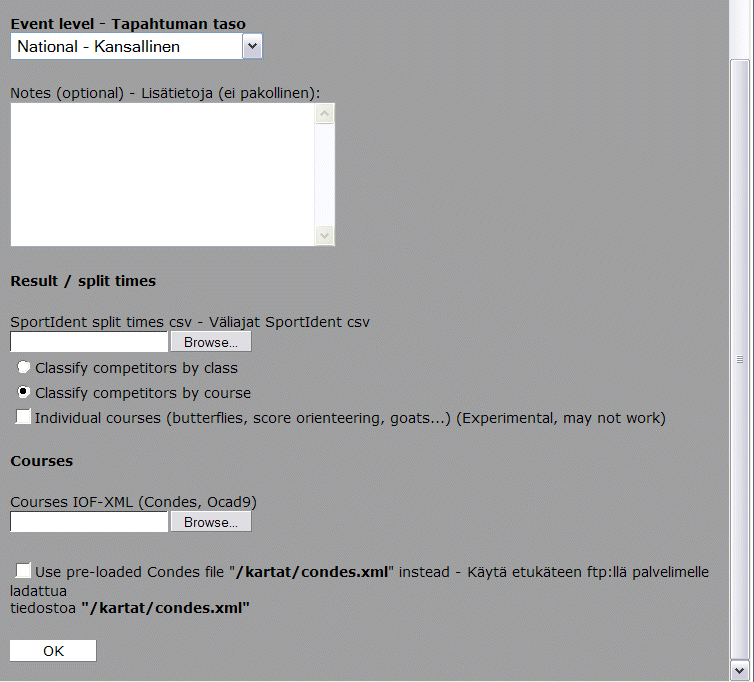
Result / split times: press the "Browse..." button and select the split times. If you stored them by course (the recommended option) then pick "Classify competitors by course".
Courses: press the "Browse..." button and select the XML file you created earlier. Note this part of the screen will be different if you used OCAD 8 (in which case you will specify the courses.txt file and the "anyname.dxf" file you created earlier).
When all this information has been entered press the "OK" screen. The following screen should appear. If the control numbers are not displayed, you might need to go back, re-enter the information and just before pressing "OK" you should turn off your internet security (temporarily).
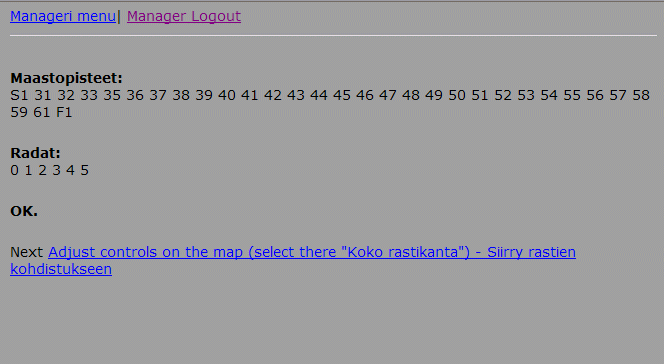
This shows that the controls are all there, so press "Adjust controls on the map". Something similar to this should appear...
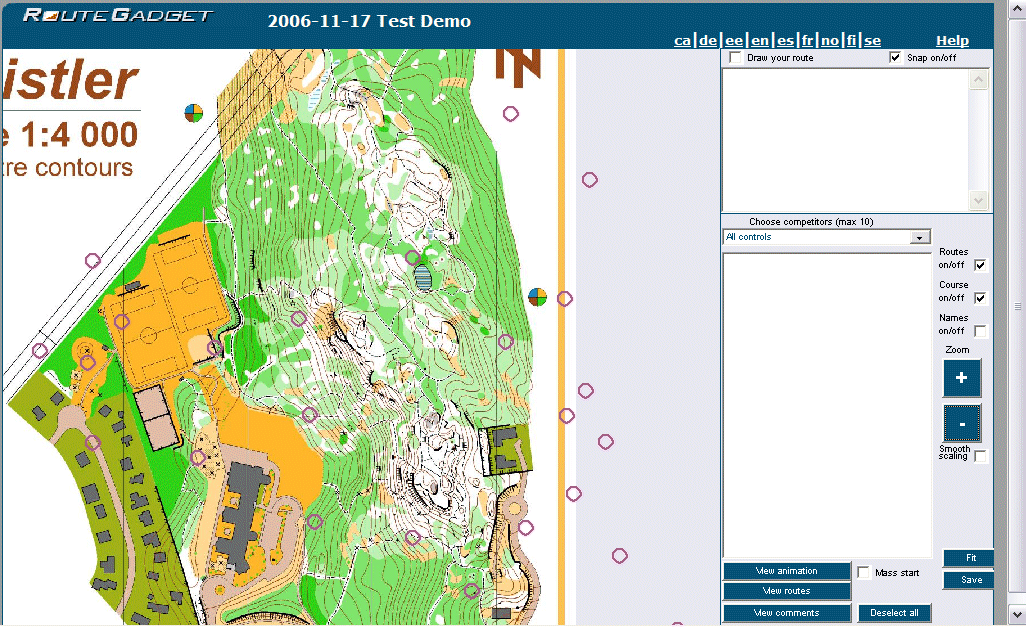
It is now time to use RouteGadget's layout tool to place the controls in the correct locations over the map. This takes a few iterations, but is quite easy. From experience, we have found it best to pick two controls close to each other and get those in the correct place - you will never get an exact placement, but 'close enough' will be fine.
First, select "All Controls" in the "Choose competitors" box on the right of the screen. Then zoom out using the big blue "-" button. Move the map around by holding down the left mouse button and dragging the map around.
Now everything is ready.
1. press the "Fit" button on the right of
the page
2. click on one control circle (say, at the top left side)
3. click on the map at the correct position for that control
4. click on a second control circle (say, at the bottom right side)
5. click on the map at the correct position for that control
All the controls should now move to new positions. Repeat steps 1-5 until you are satisfied with the control placement (remember, 'close enough' is good enough). Remember that you can zoom and drag the map while taking these steps. If something goes wrong, you can start adjusting from the beginning by reloading the page in your browser.
Once you are satisfied, press the "Save" button (just below the "Fit" button). Then you should see the final screen...
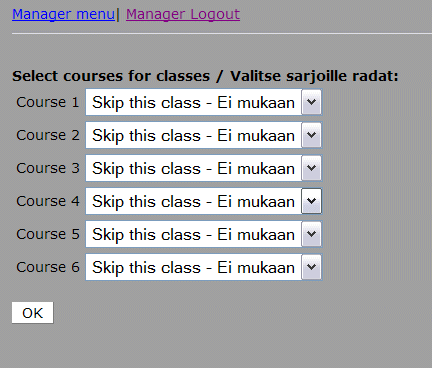
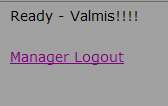
Carefully assign the courses, then press the "OK" button and you are done! Congratulations. It is now time to test it, and then send email to all competitors asking them to enter their routes.
Thank you for taking the time and effort to organize the event and also for making the event available in the COF's RouteGadget database. If you have any comments about this documentation or about RouteGadget please email Erik.
Note: It is not uncommon to 'accidentally' create several versions of an event while trying to load it into the RouteGadget database. The RouteGadget manager screen allows you to select events to delete - however we have removed the "delete" button to avoid the possibility of accidentally deleting other people's events. If you would like events deleted, please send email to Erik.
Please contact Erik Blake with any questions, concerns, or comments.
The COF RouteGadget database was created by Dave Graupner (MOA) & Adrian Zissos (FWOC), and is maintained by Erik Blake (it 'at' orienteering.ca)
RouteGadget software is created and occassionally maintained by Jarkko Ryyppo (Finland). Many thanks to Jarkko who provides this software free of charge.
Original User Guide (and photos) provided by Tapio Karras of BAOC.